News:

Forum may be experiencing issues.

Main Menu
Menu

Show posts

This section allows you to view all posts made by this member. Note that you can only see posts made in areas you currently have access to.

Show posts Menu

Messages - johnk

#46
Build Reports / Re: AU-Drive Tube Booster
February 07, 2016, 09:41:17 PM
Quote from: m-Kresol on February 07, 2016, 09:22:40 PM
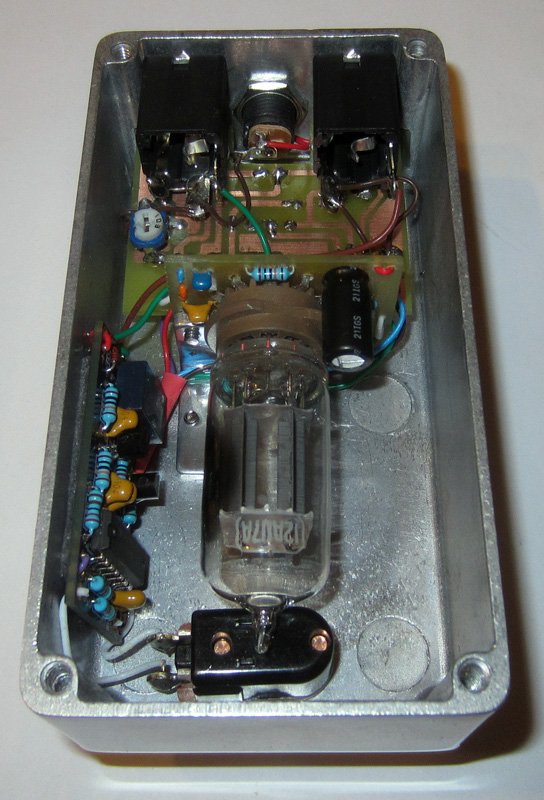
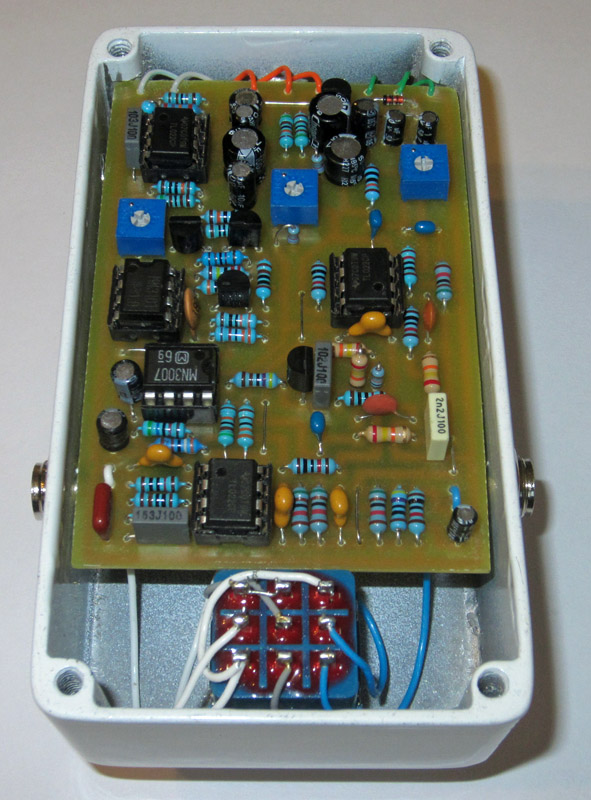
now that I think of it, how do you get the voltage you need for the plates? similar to the valvetizer or the cleggster psu? sure did a great job fitting all of this in there and making it look so spacious at the same time

it's a modified Valvecaster so it doesn't need any more than 9 volts to power it.
#47
Build Reports / Re: AU-Drive Tube Booster
February 07, 2016, 09:40:21 PM
Quote from: jimilee on February 07, 2016, 09:17:56 PM
Amazing,!!!! Question,with no airflow, does it get too hot or is the enclosure one big ole heatsink?

it only gets a little warm so it doesn't seem to need any airflow.
#48
Build Reports / Re: AU-Drive Tube Booster
February 07, 2016, 04:44:16 PM
Quote from: Martan on February 07, 2016, 12:38:26 PM
Wow! How is the L-bracket held to the enclosure? It looks like a rivet?

it 's a 4-40 oval head Philips screw.
#49
Build Reports / Re: AU-Drive Tube Booster
February 06, 2016, 04:10:37 PM
Quote from: m-Kresol on February 06, 2016, 10:48:25 AM
That looks stunning. absolutely perfect etch and I agree with alan, the polished enclosure must have been a pain. Did you use any filters when taking the first pic or is it really having this epic glow around the lit up knobs?

thanks. no camera filters or anything. it looks exactly like the pic.
and polishing the enclosre isn't really all that difficult.
#50
Build Reports / Re: AU-Drive Tube Booster
February 06, 2016, 07:05:50 AM
actually the hardest part was drawing up the PCB for the lighted pots and making the little 'L' bracket to mount the PCB with the tube socket.
#51
Build Reports / AU-Drive Tube Booster
February 06, 2016, 03:23:34 AM
here's a tube booster that I built capable of a bit of overdrive that I thought that i'd share.


#52
Build Reports / Re: Madean Rust Bucket (EHX Attack decay)
February 02, 2016, 08:06:07 AM
Quote from: Jebus on February 02, 2016, 07:19:28 AM
Alright, thanks. Do you use some polishing liquid? Does it stay that great looking over time? :)

I use polishing rouge on the wheel.

and yes, they stay shiny.


#53
Build Reports / Re: Madean Rust Bucket (EHX Attack decay)
February 02, 2016, 06:40:57 AM
Quote from: Jebus on February 02, 2016, 05:47:23 AM
Beautiful work both outside and inside. I once tried to polish a enclosure but that didn't work at all. Care to share how you do it?  :)

I just sand the bare enclosures with a Makita 5" RA sander. first with 150 grit, then 220 and finally with 320. then I polish them with benchtop buffer.
#54
Build Reports / Re: Madean Rust Bucket (EHX Attack decay)
February 02, 2016, 06:05:06 AM
Quote from: alanp on February 02, 2016, 04:25:25 AM
You've got the PCB elevated to just below the lid, doncha? :) Long legs on the pots, right?

yeah. I used regular solder lug pots and made my own 'legs' from solid core  wire. that way, not only could I make them long enough so the the PCB would sit on top of the jacks, I could also get them closer to the top of the enclosure.
I mounted the 470uf filter cap on the underside of the PCB since it wouldn't have allowed the lid to fit if it were on top of the PCB.
#55
Build Reports / Re: Madean Rust Bucket (EHX Attack decay)
February 02, 2016, 04:03:40 AM
Quote from: AntKnee on February 02, 2016, 03:52:21 AM
This looks incredibly clean. How did you get the bare surface so smooth and glassy?

thanks. I just sand the enclosures and polish them on a buffing wheel.
#56
Build Reports / Re: Madean Rust Bucket (EHX Attack decay)
February 02, 2016, 01:29:21 AM
thanks! it actually wasn't all that tight.  ;)
#57
Build Reports / Madean Rust Bucket (EHX Attack decay)
February 02, 2016, 12:29:52 AM
I just finished building my Rustbucket. I squeezed it into a standard 1590BB (etched) with side in/out jacks and a top DC jack. I also installed a relayed true bypass. I love this pedal!


#58
Requests / Re: an easier flanger?
October 08, 2014, 05:26:06 AM
thanks guys. I prefer the sound of the Current Lover over the F-301 by quite a large margin.
#59
Requests / Re: an easier flanger?
October 07, 2014, 11:32:05 PM
i built the madbean current lover and it just barely fit in a 125B. it does sound great though.


....and I got my Tonepad F-301 including a charge pump in a 1590B with no problems. it was a fairly tight fit but not too difficult.