
Great stuff - the Grapevine looks awesome! How is it labelled, is that a decal?
- Welcome to madbeanpedals::forum.
This section allows you to view all posts made by this member. Note that you can only see posts made in areas you currently have access to.
#17
Build Reports / Re: DirtBag Deluxe build
December 14, 2011, 10:22:10 AM
Thanks for the kind words! I used a ceramic cap labelled as 220pF that measured 245pF. I've got another board I've built at the same time as this one, for that I used another 220pF cap that measured 235pF. I measured a few caps to find ones that were close to 240pF, they seem to vary quite a bit. The delay pots measured 101K in this build and 98K in the other one. I also used a 10K linear pot for the feedback in both builds instead of the 10K log specified in the build doc, and it seems to function just fine over the sweep of the pot. The knobs are Davies 1400 clones from Small Bear, and there's just enough room for them to fit without the knob's pointers interfering with each other.
I don't know how many hours I spent putting these two together, maybe like 15 hours in total. I went kind of slow over the course of several days. Most of the time was spent working out how to fit everything in, and designing the decal. It's the first time I've used a fabbed board from madbean and I have to say I'm really impressed with the quality and the ease of soldering. And it sure beats etching my own board and drilling hundreds of holes!
I've gone kind of delay-crazy over the last few months, and I'm considering building another DirtBag to use the couple of V3205 chips I have just to compare how it sounds to the MN3005 versions. Based on the sound of the previous V3205 delay I built (the AD3208 from guitar gadgets) I reckon it'll sound pretty close to the 3005 version like Brian says.
#18
Build Reports / DirtBag Deluxe build
December 14, 2011, 09:45:32 AM
I just finished boxing this up tonight. Thanks to Brian for the great boards and the detailed instructions, it's a challenging build but well worth it. Sounds absolutely luscious! After calibrating the trimpots, I found myself playing guitar for about 40 minutes at the test bench (ie the kitchen table). Lovely pedal.
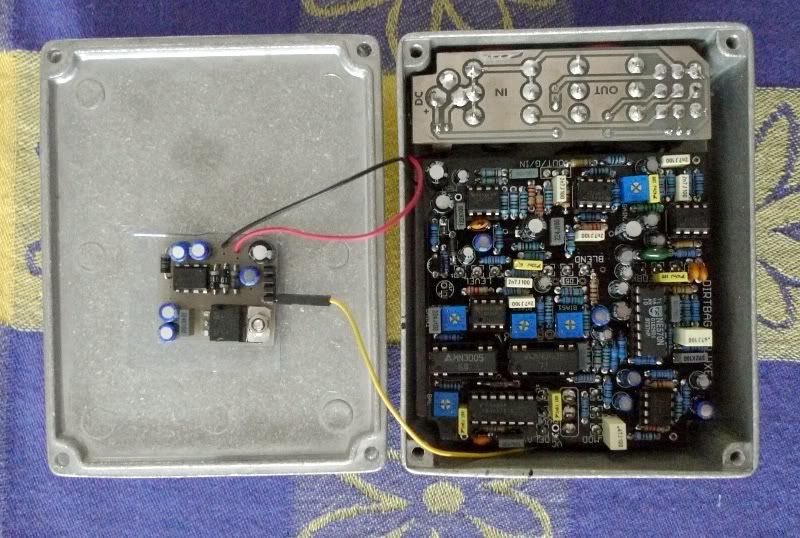
It's a tight fit in a 1590BB size case, but it's doable. I used low-profile electrolytic caps on both the main board and the roadrage power board too. Not much room to spare! I mounted the roadrage on the lid. It took me ages to work out how to mounting everything though, and plenty of designing on the computer and measuring carefully to make sure everything fit. The label is a laser-printed water slide decal using a design I put together. Not exactly original though!
The other board you can see in the pictures is an IO and power board I made, and also the footswitch mounts onto it as well. I know it's not the most conventional jack layout but I wanted a 'landscape' type orientation for the pedal.
More pics at http://s247.photobucket.com/albums/gg133/mysticwhiskey/Madbean%20Dirtbag%20Deluxe
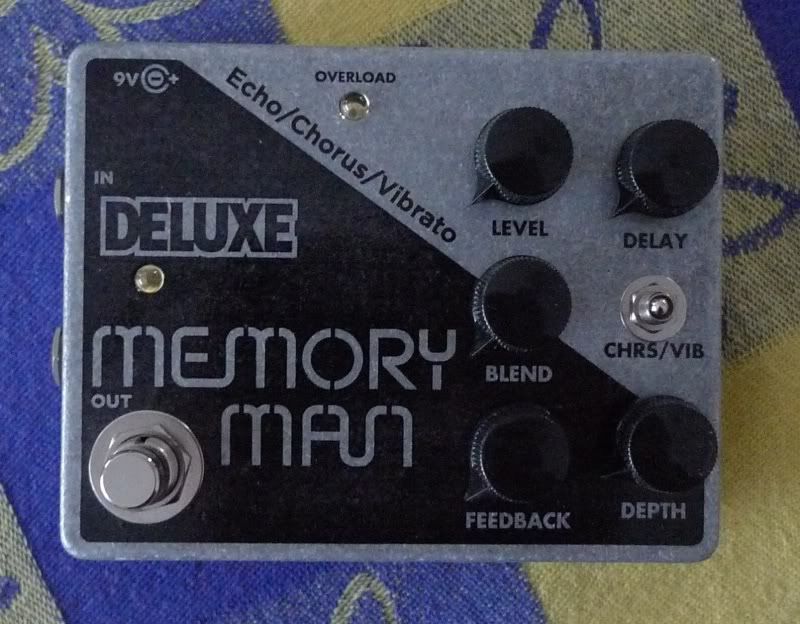
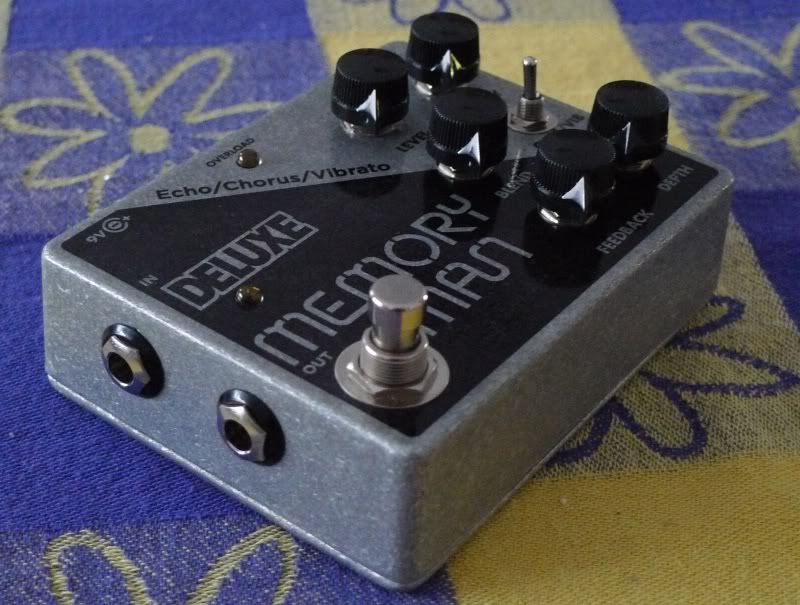
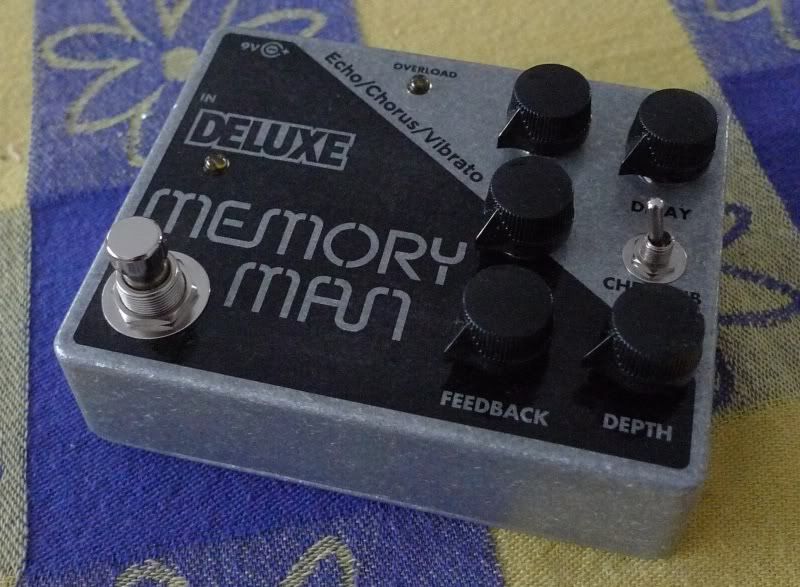
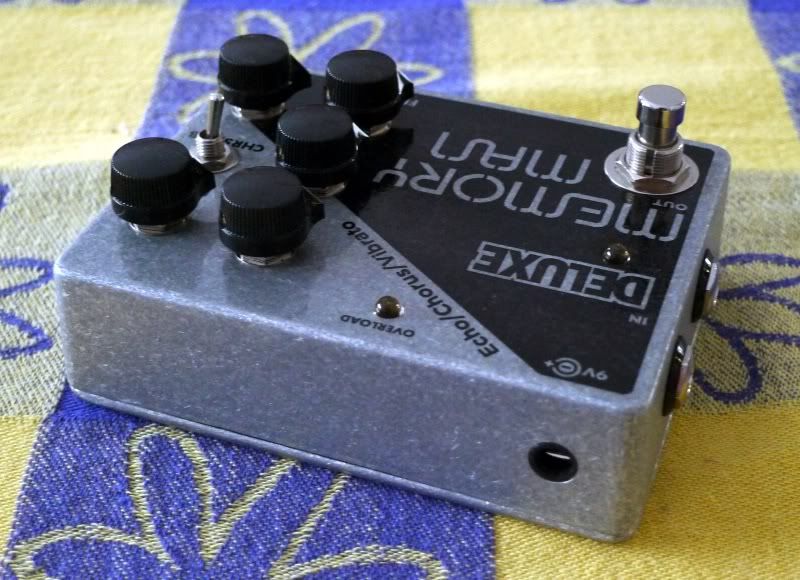
#19
Tech Help - Projects Page / Re: Road rage for dirtbag
December 10, 2011, 02:06:34 AM
Looking at the build document, it seems the 15V and 18V pads are labelled opposite to what they should be on the Roadrage double-sided board. The single-sided board is correctly labelled though.
(Edit: first post here - hi everyone!)
(Edit: first post here - hi everyone!)